1. Live Server Extension 설치 후 실행

Extesion에 들어가서 LiveServer 검색후, 마우스 우클릭 후 Open with Live Server 또는 Go Live로 시작하면 된다.
2. OpenSSL 설치
2-1. OpenSSL 다운로드
다운로드 후 압축을 풀고, 해당 경로를 꼭 기억해두자!!
https://code.google.com/archive/p/openssl-for-windows/downloads
Google Code Archive - Long-term storage for Google Code Project Hosting.
code.google.com
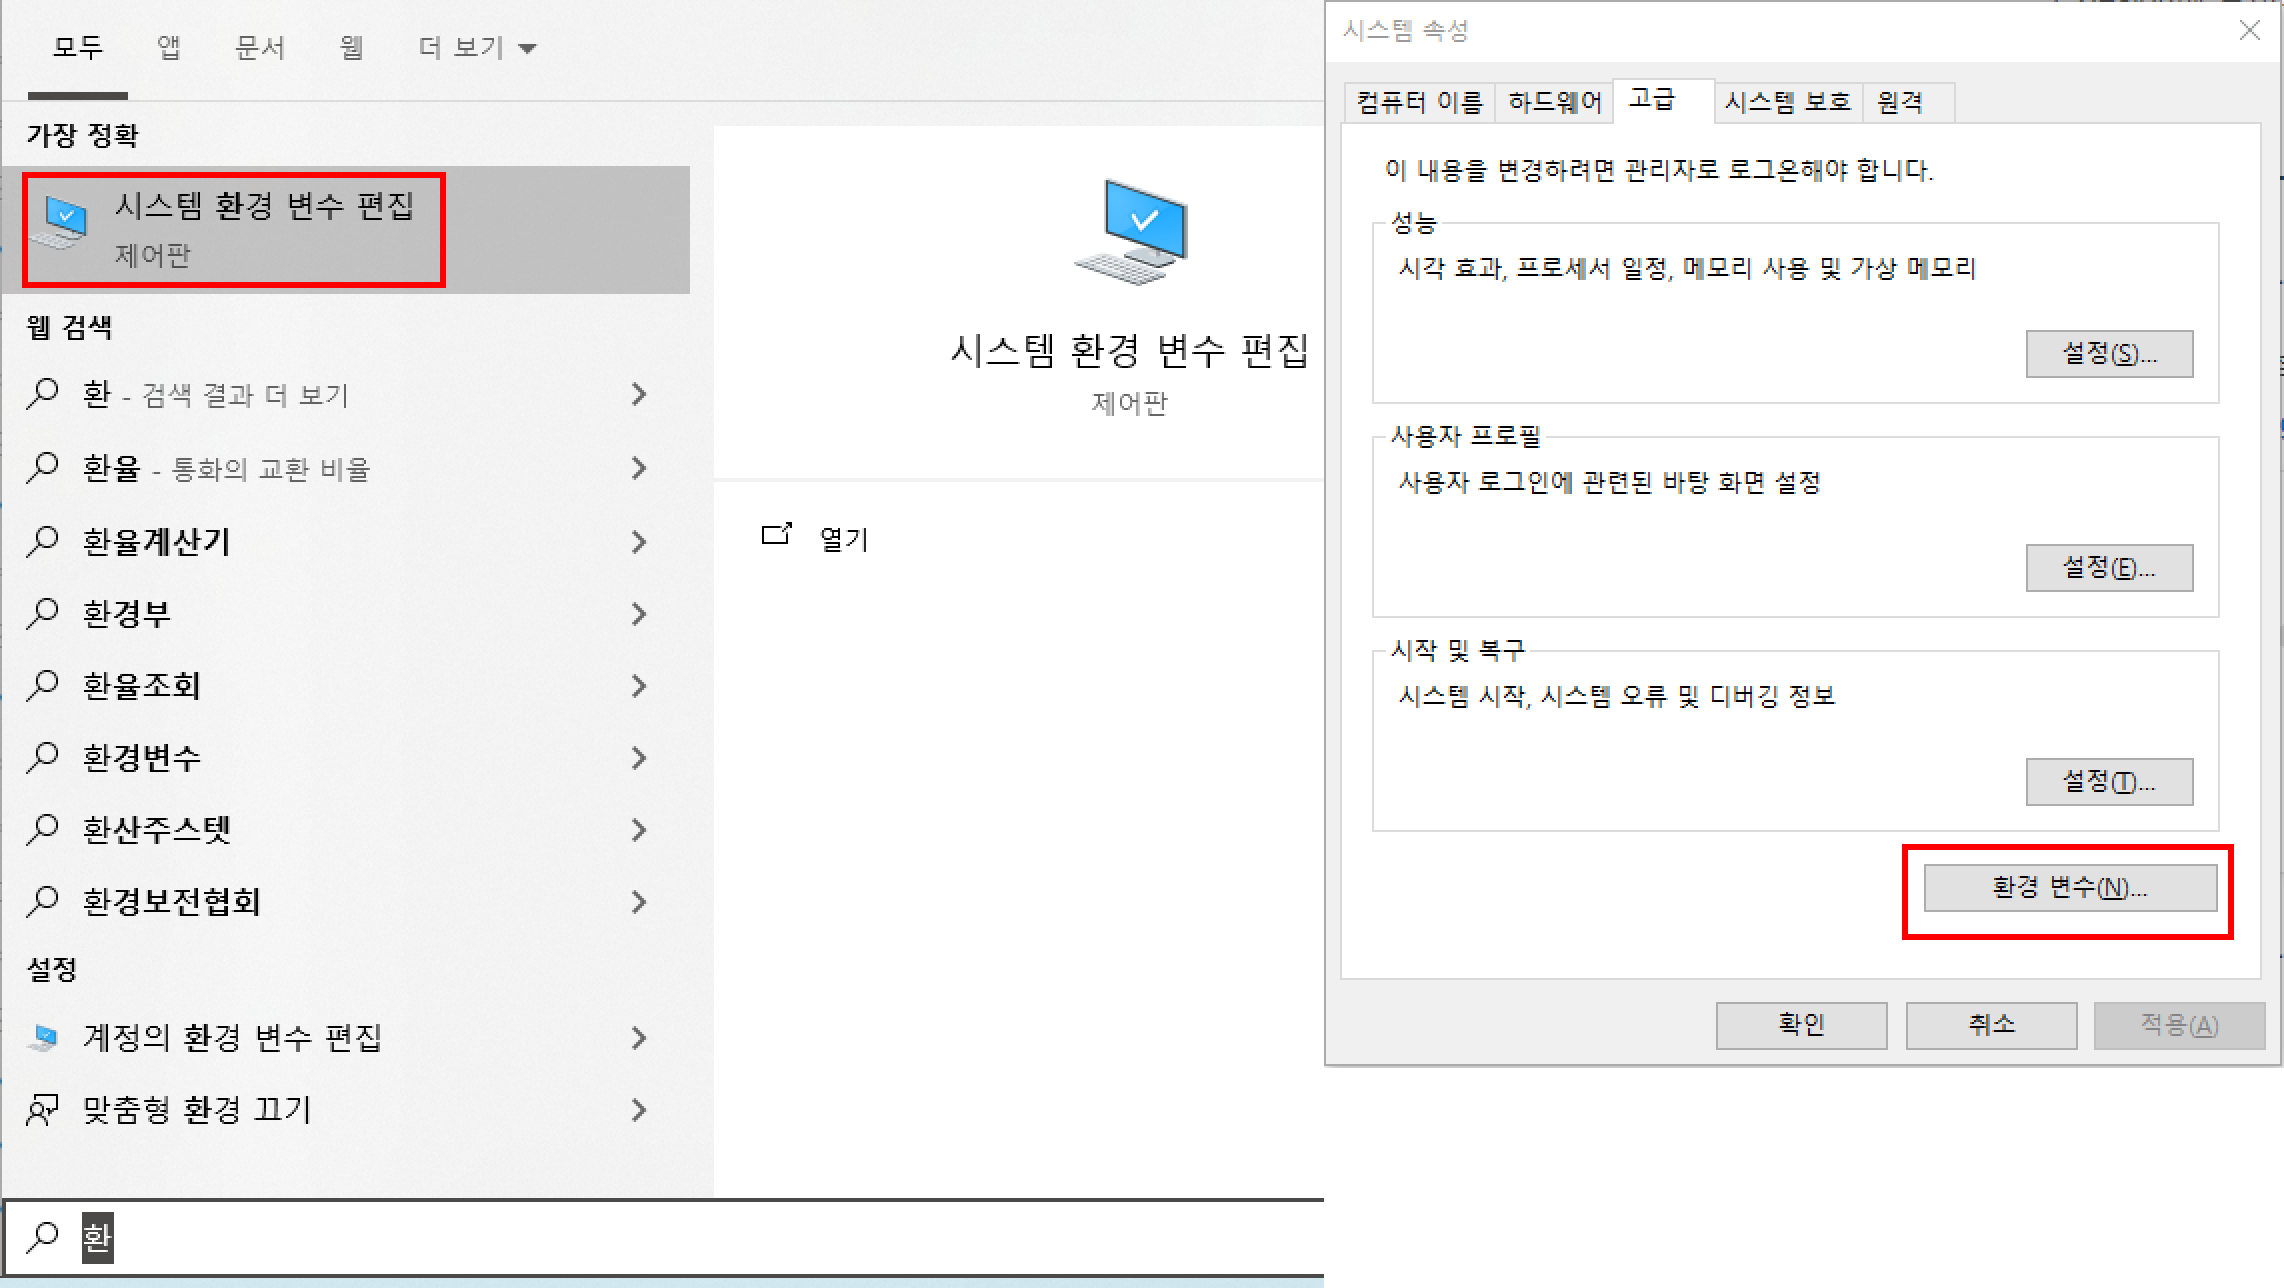
2-2. OpenSSL 경로 환경변수 등록

3. OpenSSL로 인증서 만들기
프로젝트 폴더 안에서 아래 명령어 입력하기
인증서 생성시 기입한 비밀번호를 꼭 기억하자!!!
openssl genrsa -aes256 -out localhost.key 2048 // 생성시 기입한 비밀번호를 꼭 기억하자!!!
openssl req -config "${아까 그 OpenSSL 설치 경로명}/openssl.cnf "-days 3650 -new -newkey rsa:2048 -key localhost.key -x509 -out localhost.pem
4. Live Server에 해당 인증서와 포트 적용하기
프로젝트 디렉토리 바로 아래에, ".${프로젝트 폴더경로}/.vscode/settings.json" 파일이 없다면 만들고, 있다면 "settings.json"을 수정한다.
{
"liveServer.settings.port": 443, // 요렇게 하면, ip뒤에 포트번호를 입력하지 않아도 된다!
"liveServer.settings.root": "/",
"liveServer.settings.CustomBrowser": "chrome",
"liveServer.settings.https": {
"enable": true,
"cert": "${프로젝트 폴더 경로}/${아까만든 인증서가 위치한 폴더}/localhost.pem",
"key": "${프로젝트 폴더 경로}/${아까만든 인증서가 위치한 폴더}/localhost.key",
"passphrase": "${인증서를 생성할때 썼던 비밀번호}"
}
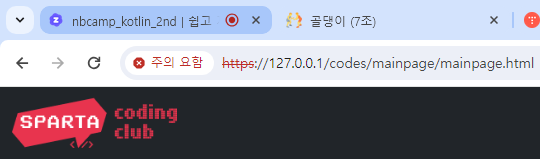
}5. 다시 Live Server를 켜보면 끝!
쨔잔~ https 로 바뀌었다!
번외
크롬의 경우 "고급 => 안전하지 않음" 을 이동을 눌러줘야한다.

이유는 openssl로 생성한 인증서가 공증된 인증서 생성기관이 아니기 때문이다!
openssl은 그냥 로컬에서 돌아가는 인증서 생성 알고리즘일 뿐이다.
'서버 개발' 카테고리의 다른 글
| [서버개발] ssh/sftp cmd 에서 접속하기 (script 제작) (4) | 2024.12.22 |
|---|---|
| [서버 개발] NAS 구축 (Unbuntu + MobaXterm) (4) | 2024.10.01 |
| [서버 개발] @Transactional 과 LazyInitializationException (1) | 2024.05.29 |
| [서버 개발] 한국도메인 DNS 설정하기 (1) | 2024.04.23 |